Snow + Glitter Putz House Tutorial
Maybe its the Chicagoan in me, but I love adding snowy rooftops and landscapes to my putz houses! This tutorial is all about creating the glittery vintage style details that make putz houses so magical!
These directions pick up from my tutorial on how to glitter your house

Craft Supplies
* Deco Art Snow-Tex (small jar)
* Ultrafine Crystal Glitter (Roof/Chimney)
* Larger Size Crystal Glitter (Snow)
* Water + Paper Towel (to clean brushes)
* Shallow Box + Wax Paper (to catch & reuse glitter)
* Light Blue Acrylic Paint (optional)
Putz House Ornament Prep
If you’re making a stand alone putz house, skip to the next section on Making it Snow..
Decide where to place your house and bottle brush trees on the chipboard base.
Use a pencil to mark both trees placement on the base. (this is also a good time to sign & date the bottom of your chipboard base with a Sharpie)
This step is totally optional, but I like to paint swirls of pale blue paint across the chipboard base to break up & accent the snow. Let the paint dry a few minutes before adding Snow.
Glue your house to the base & hold until set.


Making It Snow
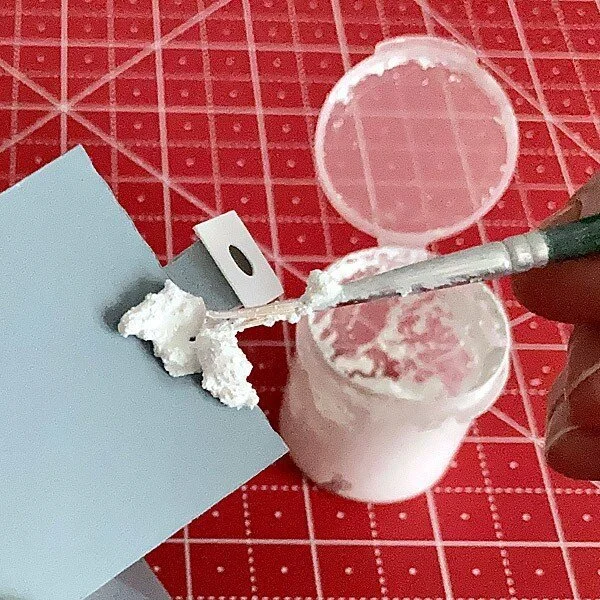
• Apply 2-3 small mounds of Deco Art Snow-Tex to the roof peak with a flat paintbrush. (thin your snow with couple drops of water if it’s too thick to easily work with)
• Switch to a small detail paintbrush & use the tip to push & shape the snow into drifts.
• Apply more snow to continue creating snowdrifts across both sides of the peak, around the chimney & chimney top. Add a couple snowdrifts in open areas of the roof.
• Set aside to dry thoroughly — 4 hours to overnight before glittering.


Glittering the Chimney + Roof
Use a smaller paintbrush to apply glitter glue around the snow to all 4 side of the Chimney.
Hold your house over the glitter box & cover each side of the chimney with Ultrafine Crystal Glitter.


Apply glitter glue around the snow on one side of the Roof. Switch to a larger paintbrush to cover the open roof areas. Work quickly to cover the roof & even out the glue Check your glue coverage. before you apply glitter
Holding the house over your glitter box, sprinkle/pour a thick layer of Ultrafine Crystal Glitter over the Roof. Shake to cover the surface.
Follow the same steps to glitter the other side the roof. Set aside to dry.
Glittering the Snow


➤ I like to cover the snow with larger crystal glitter to create contrast and a vintage holiday look.
Apply glitter glue with a smaller detail paintbrush to an area of snow on the roof peak .
Holding your house over the glitter box, sprinkle the glue covered snow with larger crystal glitter. Shake to cover and shake off excess glitter.
Follow the same steps to cover all the snow on your roof & chimney with glitter
Set the house aside to let the glittered snow dry 30 minutes-an hour.

Landscaping Ornaments
• Apply snow around the base of the house, varying the size & depth of the snowdrifts.
• Place a toothpick onto a bottle brush tree placement mark. Create a snowdrift around the toothpick. Remove the toothpick, leaving a small opening to glue the wire trunk of each bottle brush tree.
• To finish landscaping, add a couple snowdrifts across the yard . Let snow dry thoroughly before glittering.
• Glitter the snow +top of the chipboard base using the same techniques. Set aside to dry.

Finishing Touches
• Sign + date your chipboard base
• Glue both bottle brush tree into their snowdrifts.
• Glitter the bottom of the base + set aside to dry.
• Glue the tinsel trim around the outside edge of the chipboard base.
• Admire your finished house!